Guide to RV Battery Maintenance and Replacement
Recreational Vehicles (RVs) offer a unique way to explore the world, providing both transportation and accommodation on the go. One of the most critical components of your RV is its battery system, powering everything from lights and appliances to essential electronics. In this guide, we’ll delve into the importance of RV battery maintenance and replacement, ensuring your adventures are never disrupted by a dead battery.
Understanding RV Battery Types: RVs typically use two main types of batteries: deep-cycle batteries and starting batteries. Deep-cycle batteries are designed to provide a steady amount of power over a longer period, making them ideal for powering appliances and lights. Starting batteries, on the other hand, deliver short bursts of high power to start the RV’s engine. It’s crucial to understand which battery types your RV uses for proper maintenance and replacement.
Regular Maintenance: Proper maintenance extends the lifespan of your RV batteries and ensures their optimal performance. Here’s a step-by-step maintenance routine to follow:
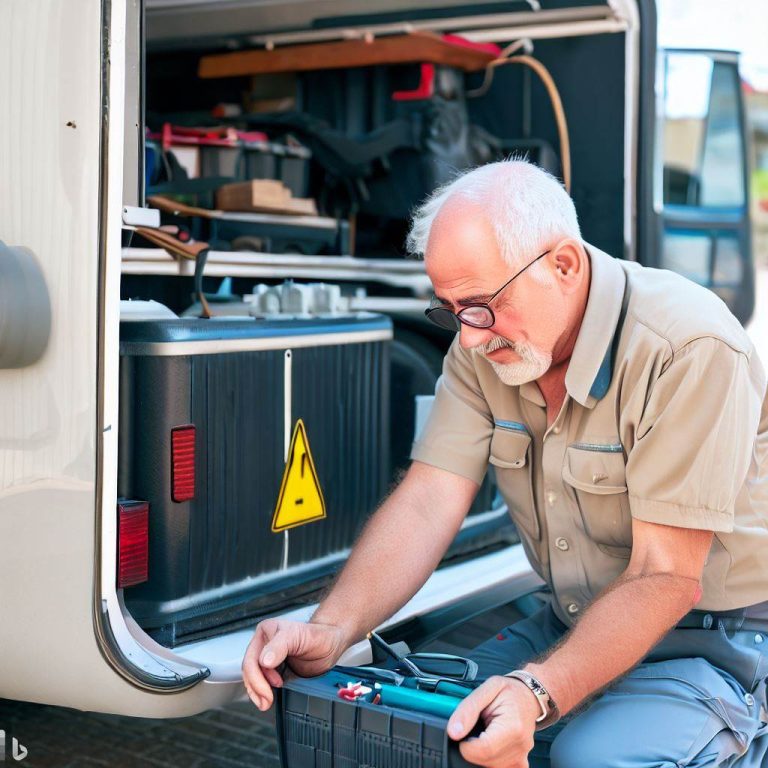
- Visual Inspection: Regularly examine the battery for signs of corrosion, leaks, or physical damage. Clean any corrosion using a mixture of baking soda and water, and replace damaged batteries promptly.
- Check Voltage Levels: Use a voltmeter to measure the voltage of your batteries. A fully charged 12-volt battery should read around 12.6 to 12.8 volts. If the voltage drops significantly, it might be time for a recharge.
- Water Levels: For flooded lead-acid batteries, check the water levels in each cell every few months. Add distilled water if the plates are exposed, ensuring they’re covered by about 1/4 to 1/2 inch of water.
- Clean Terminals: Clean the battery terminals with a wire brush to remove any buildup of corrosion. Apply a thin layer of petroleum jelly or specialized terminal protectant to prevent future corrosion.
- Charging: Keep your batteries charged, especially during periods of inactivity. Use a quality RV battery charger or a solar panel system to maintain a healthy charge.
- Equalization: For flooded lead-acid batteries, perform an equalization charge occasionally to help prevent sulfation. Follow the manufacturer’s recommendations for the proper procedure.
Signs of Battery Replacement: Even with meticulous maintenance, RV batteries have a limited lifespan. Look out for these signs that indicate it’s time for a replacement:
- Diminished Capacity: If your batteries can’t hold a charge as long as they used to, or if they drain quickly, it’s a sign of decreased capacity and a need for replacement.
- Sulfation: Sulfation occurs when lead sulfate crystals build up on the battery plates, inhibiting their ability to hold a charge. Severe sulfation might require replacement.
- Low Voltage: If your batteries consistently fail to maintain an adequate voltage level despite charging, it’s an indication that their internal chemistry is compromised.
- Physical Damage: Cracks, bulges, or leaks in the battery casing are signs of internal damage, requiring immediate replacement for safety reasons.
Choosing the Right Replacement Battery: Selecting the right replacement battery is crucial for optimal RV performance. Consider these factors:
- Battery Type: Choose deep-cycle batteries for house power and starting batteries for the engine. Opt for AGM (Absorbent Glass Mat) or Gel batteries for maintenance-free and vibration-resistant options.
- Capacity: Determine your power needs and choose a battery with sufficient capacity to meet them. Consider factors like the number of appliances, lights, and devices you’ll be using.
- Size and Fit: Ensure the replacement battery fits in your RV’s designated battery compartment without modifications.
- Brand and Quality: Invest in reputable brands known for their quality and durability. Quality batteries might cost more initially but can save you money in the long run.
Installation and Replacement: Installing a new RV battery requires attention to detail. Follow these steps:
- Safety First: Disconnect the old battery by removing the negative terminal first, followed by the positive terminal. Wear safety goggles and gloves to protect against any acid or corrosion.
- Clean the Compartment: Clean the battery compartment and terminals thoroughly before installing the new battery.
- Terminal Connection: Install the new battery by connecting the positive terminal first, followed by the negative terminal. Make sure the connections are tight and secure.
- Secure the Battery: Secure the battery in place using appropriate brackets or straps to prevent movement during travel.
- Test and Monitor: After installation, test the battery’s voltage and functionality to ensure everything is working correctly. Monitor the battery’s performance during your next few trips.
Conclusion: Your RV’s battery system is the lifeline of your mobile adventures. With regular maintenance and proper replacement when needed, you can ensure a smooth and enjoyable journey every time you hit the road. By understanding battery types, implementing a maintenance routine, recognizing signs of replacement, and making informed battery choices, you’ll be well-equipped to keep your RV powered and ready for all your travel aspirations. Remember, a little care for your batteries goes a long way in enhancing your overall RV experience.